Invites
Included on this page:
-Preliminary computer and formatting images
-Instructions for maps
-Printing and assembly
-Wrap around labels (templates included)
-Belly Band instructions
-Pictures of completed invitations!
Preliminary Work
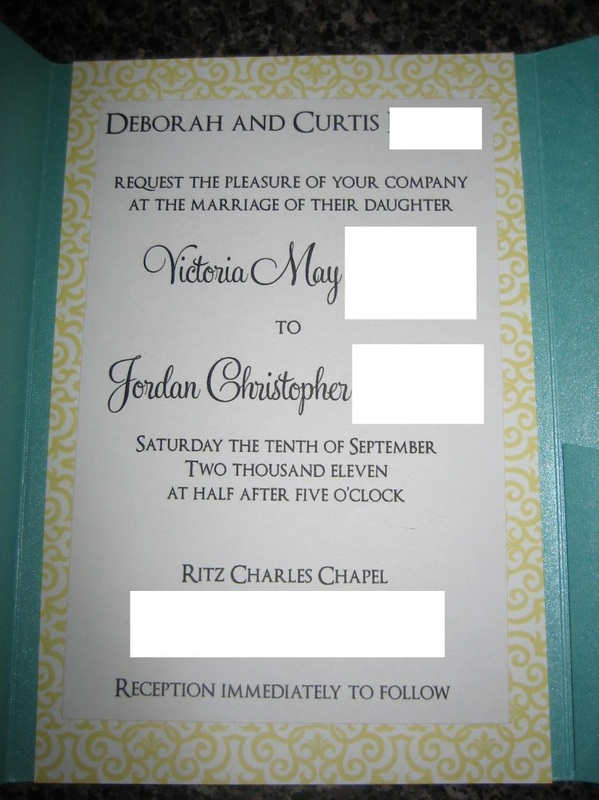
I created the invitation template in Microsoft Publisher. Everything was created to-scale, based on a 5x7 pocketfold. That way it was easier to determine how much paper I needed to order.
The script font is Feel Script (download here)
The rest of the font is OptimusPrinceps (download here)
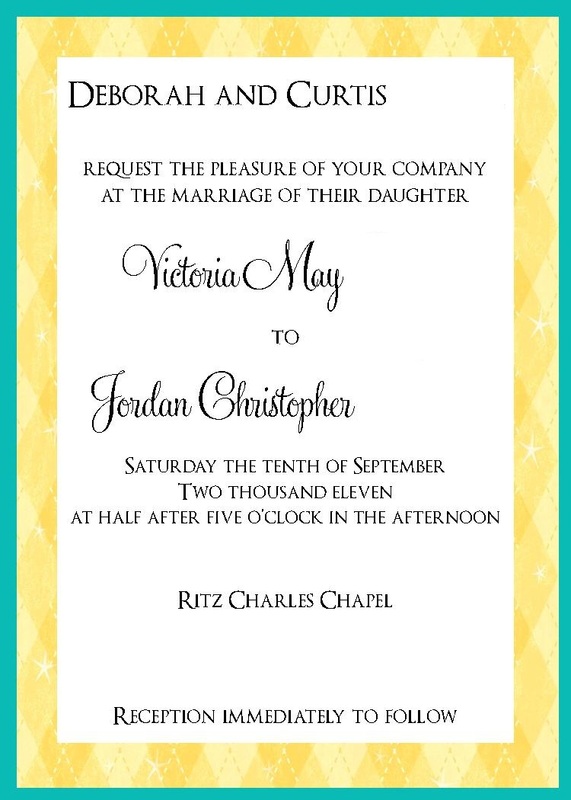
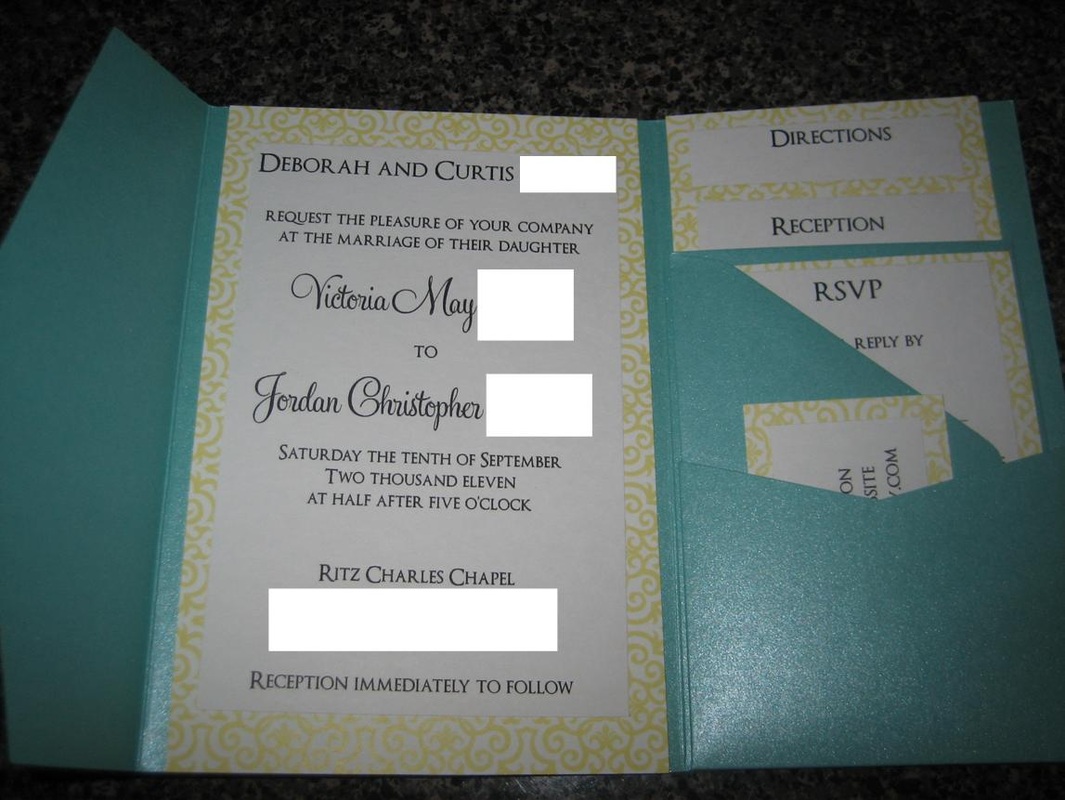
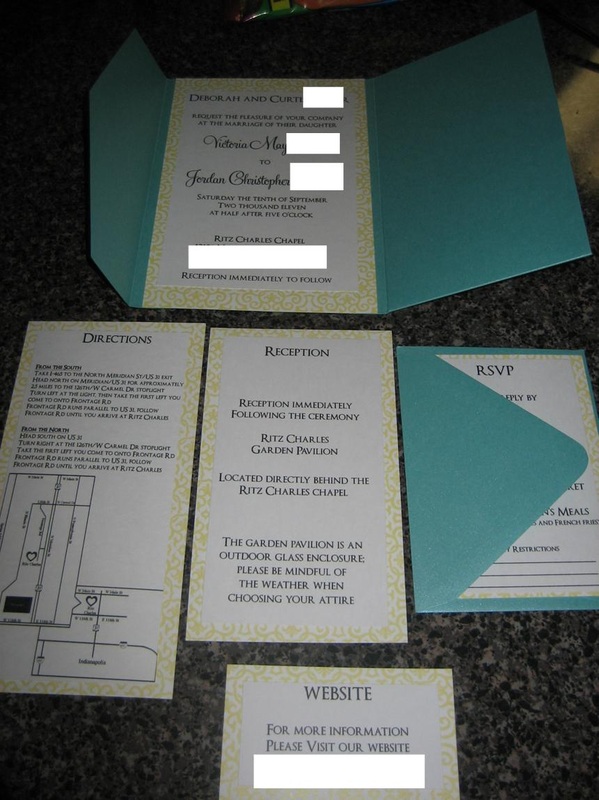
Invitation 4x6 Enclosures
Yellow mat 5x7
Yellow mat 5x7
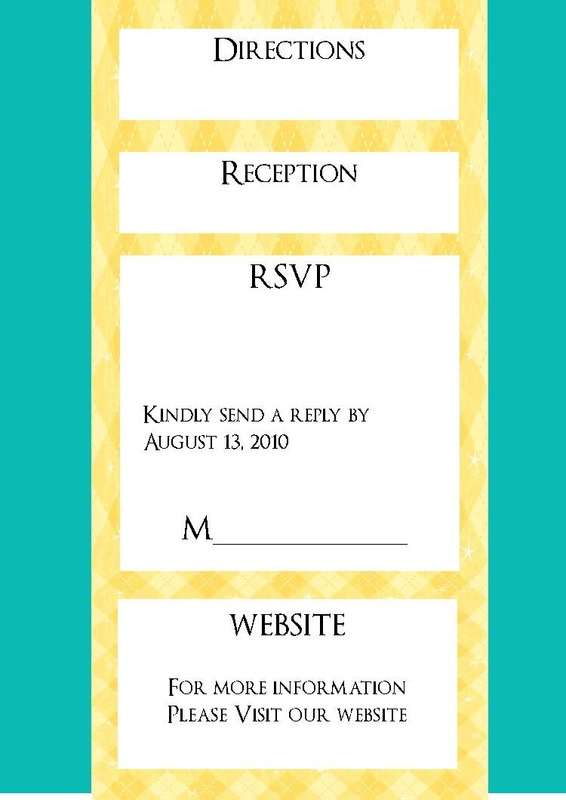
Enclosures
These are the four enclosures that will be included with the invitation. Hopefully since everything is already created, it will be fairly easy to just go ahead and print.
Website RSVP Reception Directions

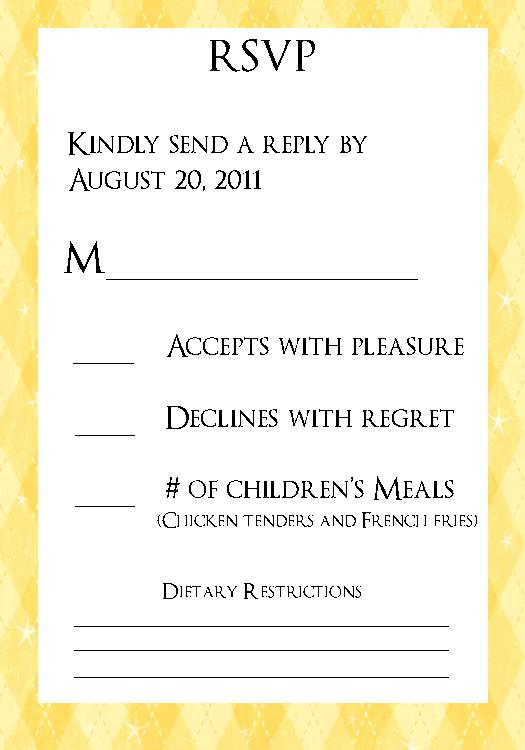
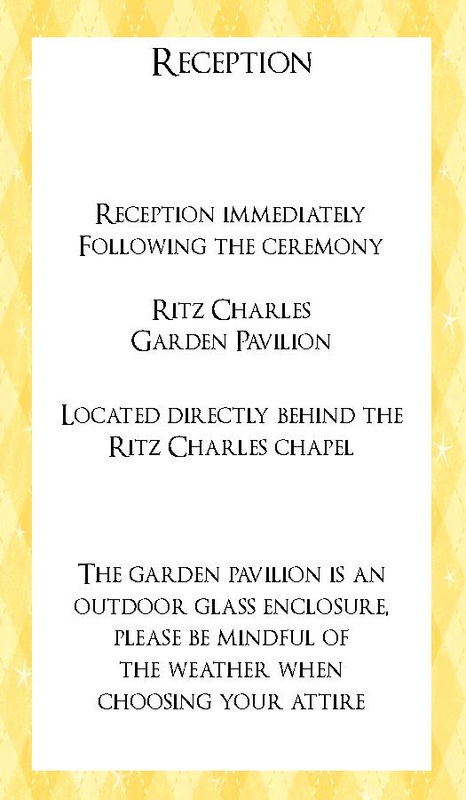
White 1.5x3 White 4.5x3 White 5.5x3 White 6.5x3
Yellow mat 2x3.5 Yellow mat 5x3.5 Yellow mat 6x3.5 Yellow mat 7x3.5
Yellow mat 2x3.5 Yellow mat 5x3.5 Yellow mat 6x3.5 Yellow mat 7x3.5
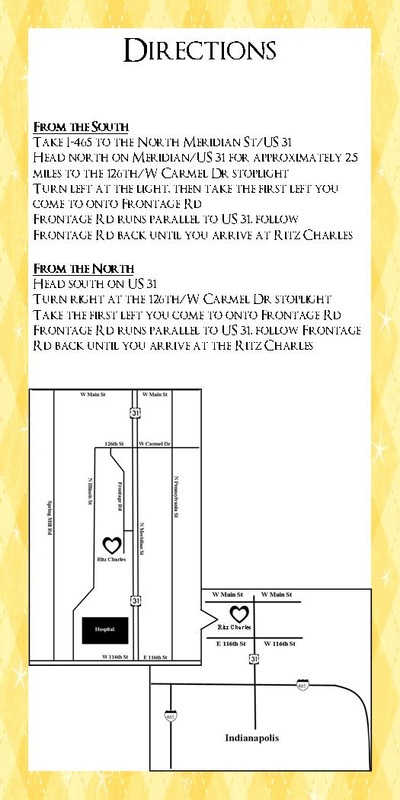
Instructions for Maps
I pulled up the address on Google Maps and took a screen shot (PrntScr button). Then I pasted the image onto a Publisher document (Word or Powerpoint would work also). Then, I traced over the roads using the lines in Autoshapes. I inserted text boxes and typed in the road names. I inserted clipart images for highway signs and for the heart designating the venue. Then I deleted the Google Maps image and was left with the black and white custom map.
I repeated the same process for the zoomed in map.
Completed Invitations
NOTE: My completed invitations weigh 2.1 ounces. So if you want to pay less postage, then you should omit some enclosures or the belly band, or something.
Supplies
Stardream Lagoon Pocketfolds - from Cards and Pockets
Patterned Paper - yellow tile - from Cards and Pockets
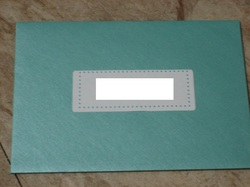
Invite Envelopes - yellow - from Cards and Pockets
RSVP Envelopes - Stardream Lagoon - from Cards and Pockets
White cardstock - 110 weight - Walmart
Glue sticks - In hindsight, I wish I would've used glue dots for assembly
Ribbon
Paper cutter - I used the 12" Fiskars and absolutely loved it
Canon MP520 printer - Walmart (it was cheaper to get a new printer than to buy ink for my old printer)
Total Cost = $1.97 per invite (not including belly band ribbon or postage)
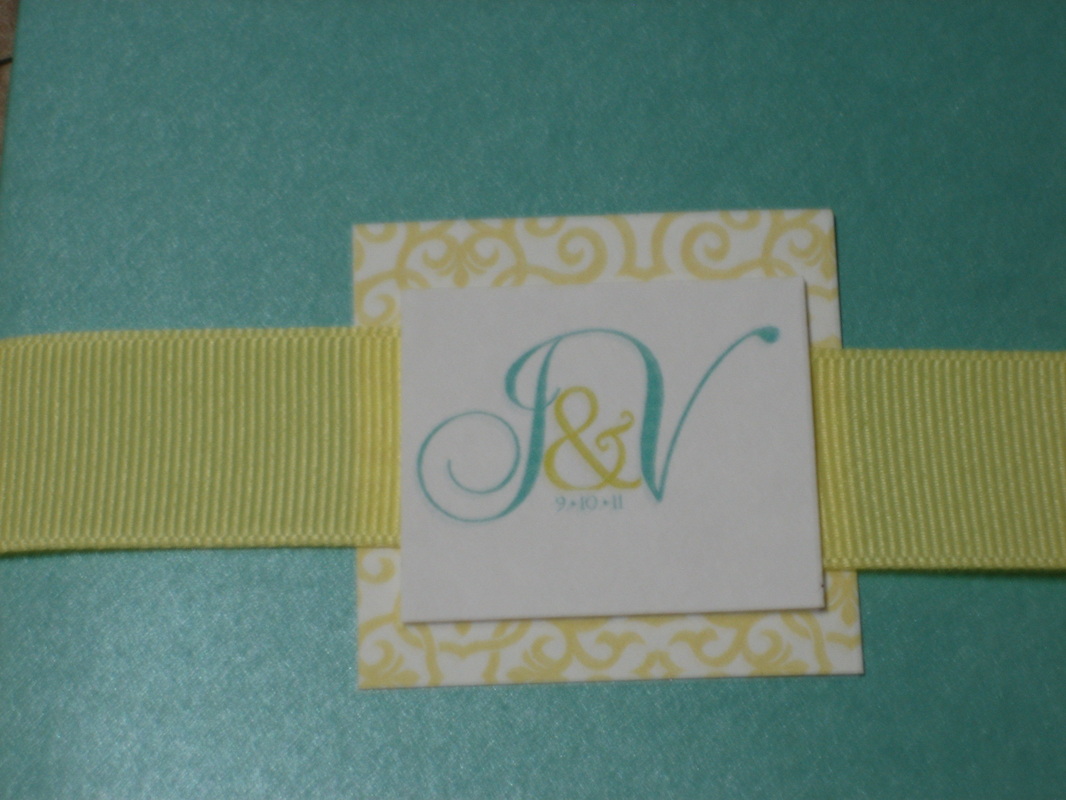
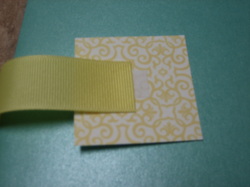
Belly Band
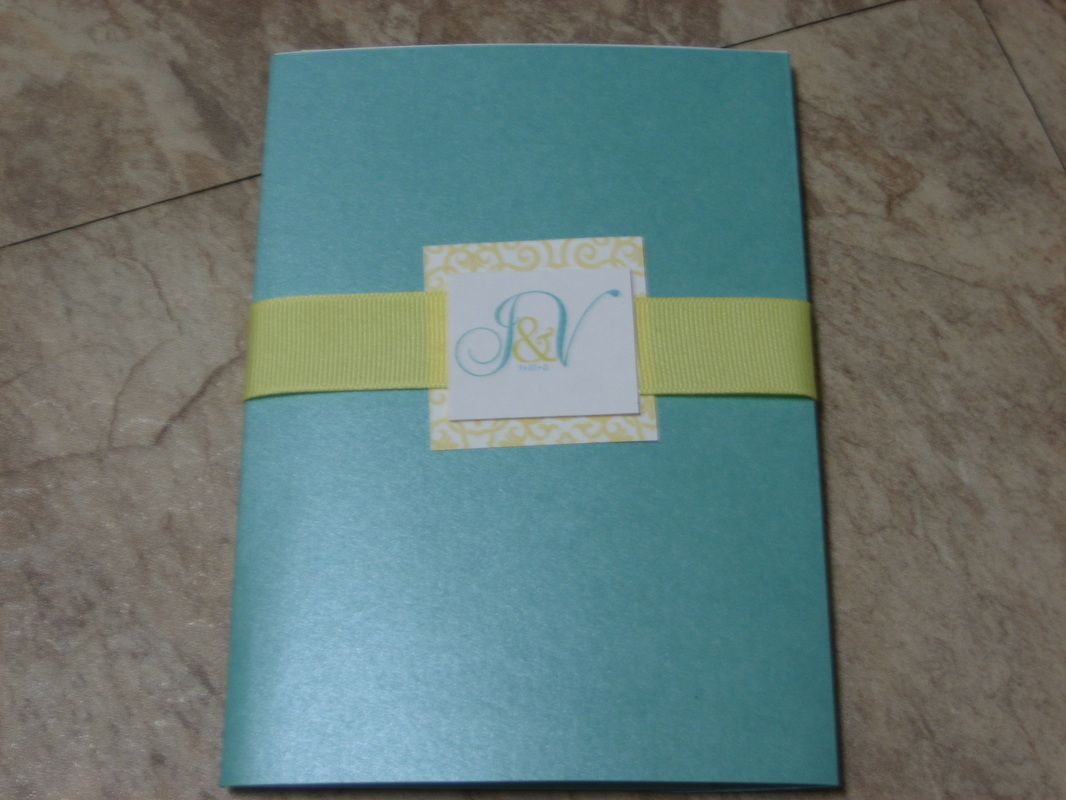
How to assemble:
Step 1: Lay the ribbon under the invitation. Place the mat on top.
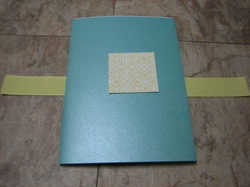
Step 2: Place a glue dot (I prefer squares) in the center of the mat. Then bring the left side over and place it over half of the dot.
Step 3: Bring the right side over and place it on the glue dot. Overlap is fine, it will be covered by the monogram.
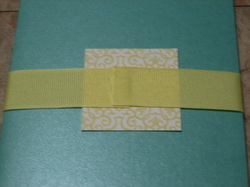
Step 4: Place glue dots like this. If there's enough ribbon overlap, you can help hold it down by strategically placing one of the glue dots on it.

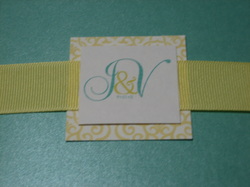
Step 5: Place your monogram on top of the glue dots. Ta da! Now you're finished.
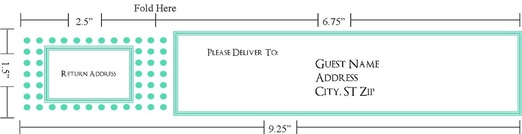
Wrap Around Labels
Here is the finished product. If you like them, you can read on about how I created them and download the templates. If you don't like them, you can stop reading now.
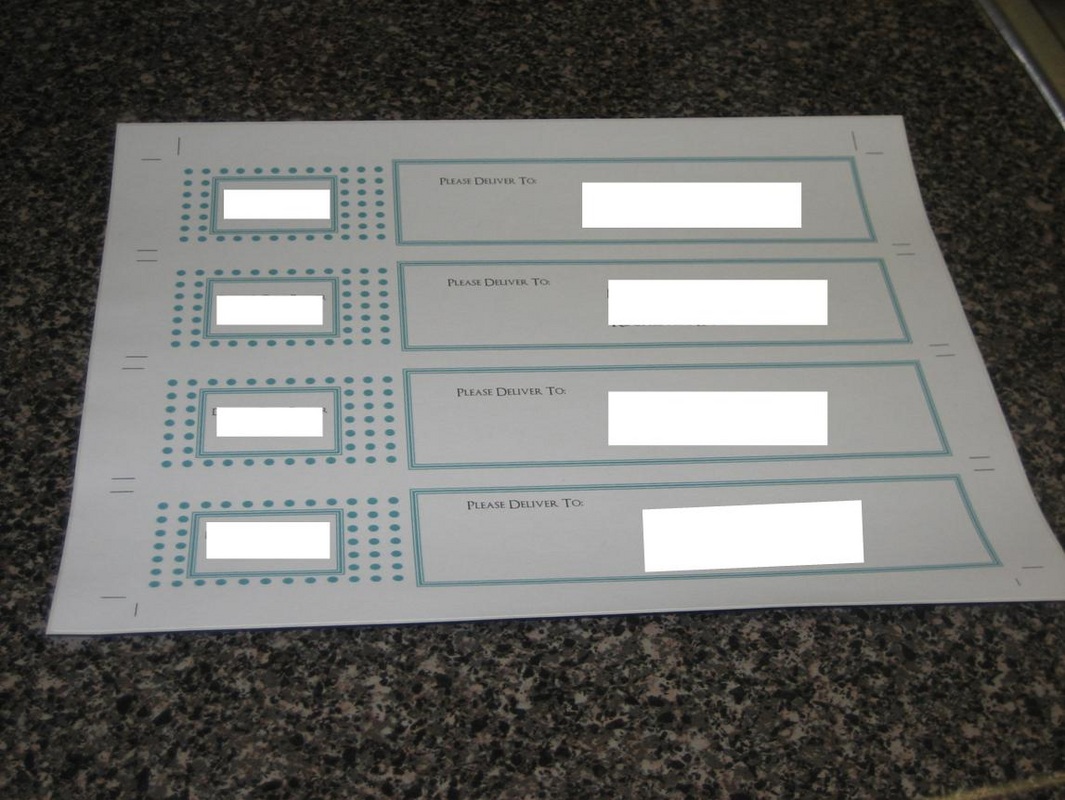
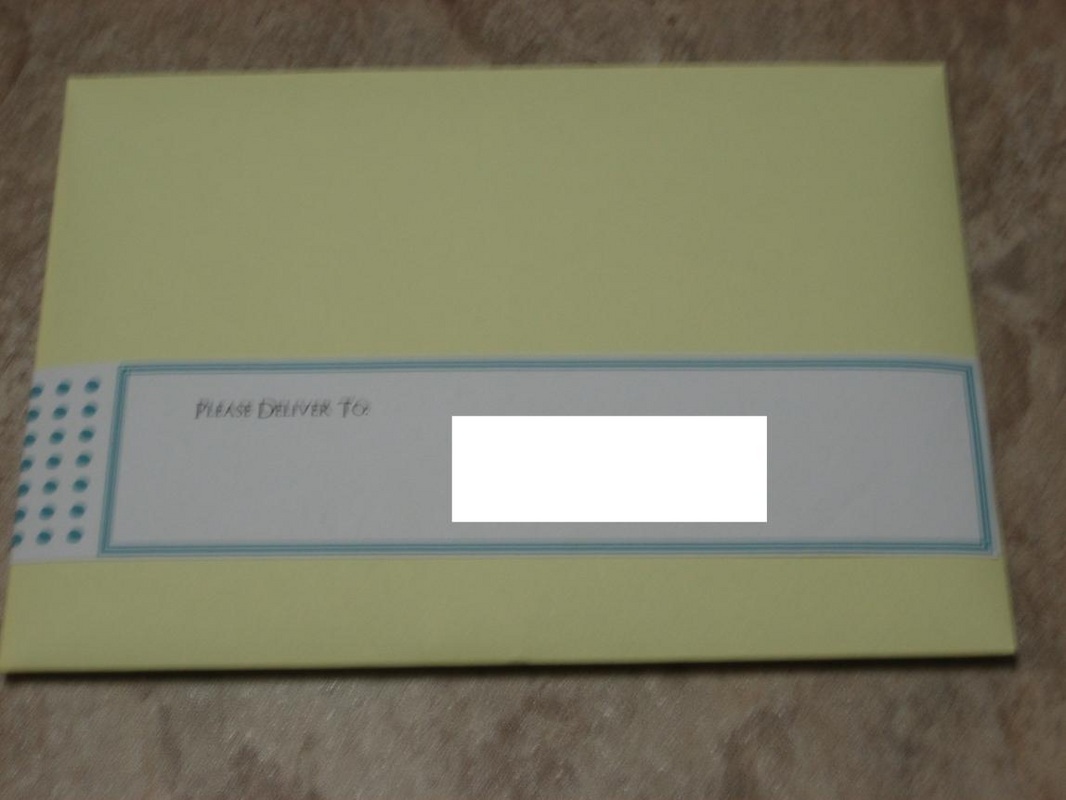
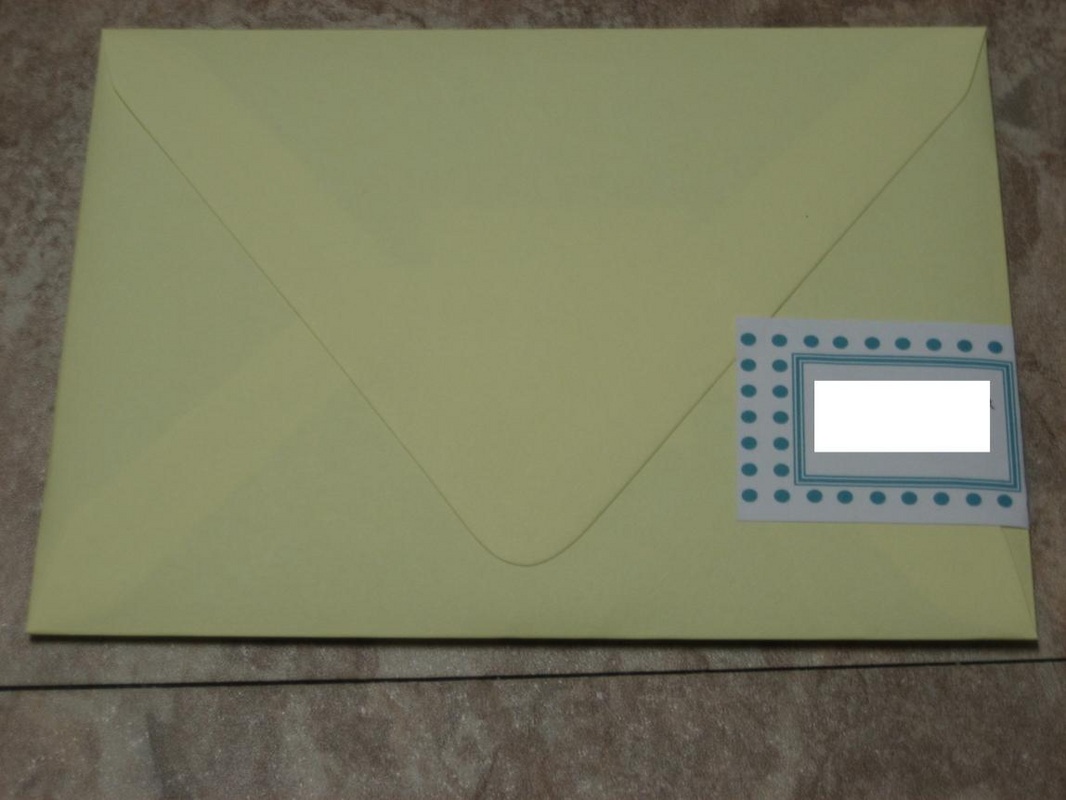
PLEASE NOTE: These pictures are using the Wrap Around Labels II template (located on the Download & Templates page).
These took longer to create than I'd like to admit (on the computer I mean, the cutting and sticking on was a breeze). I used 8.5"x11" sticky label paper.
The envelopes are 7.25" wide, so the address part covers the entire 7.25" and the remainder was made to be the return address part. Hopefully the pictures help explain.
Here is the template for Microsoft Publisher. I have ungrouped everything in the top label, so if you want you can go in and change the colors, positions, text boxes, etc. If you like everything about the labels (I sure do!), the remaining labels are still grouped and all you'd have to change are the addresses. You can move the labels around if you're going to try to match them up with some precut labels sheets.
Here is the template for Microsoft Word. Same thing as above - the first label is ungrouped so you can go in and edit the colors or positions of things. The remaining labels are grouped together so you are unable to change the colors or text boxes. You can move the labels around if you're going to try to match them up with some precut labels sheets.
If you do change the colors and things, the easiest thing to do next would be to delete the remaining labels. Group everything together that you edited (In Word, hold down shift and left click on all of the objects, then right click and group. In Publisher, you can just drag your mouse to highlight everything and click the grouping icon that appears.) After everything is grouped together, you can just copy and paste the image 5 more times to have a full sheet of labels.
PS - please give me credit if you use these and post pics on your planning website. Thanks!
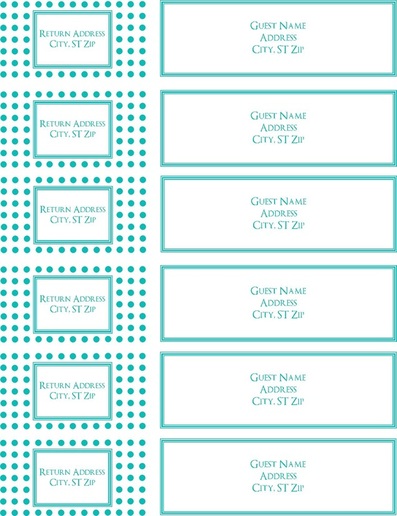
This is what the 8.5"x11" template looks like
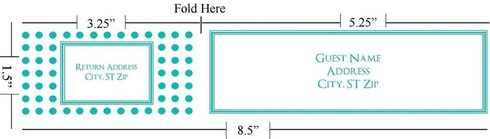
These are the dimensions for each label.
Wrap Around Labels II
I need to quit making things, because I just change my mind. After some test prints, I adjusted the colors, and decided that I want the address part to take up more of the envelope. So, here are the new ones. Download is located on the Download & Templates page under DIY.
RSVP Labels
These were made using the Avery template for address labels. The dot colors match the colors from Wrap Around Labels II. Template is available on the Downloads & Templates page.